Last February, I talked about gl-react at React.js conference.
Checkout talks of this conference if you are interested by React subject. I want to thanks the incredible team behind React.js for the awesome conference and giving me the opportunity to come to San Francisco.
This article will cover some more technical detail of gl-react that wasn't explained in the talk.
Also, I'll try to not go TOO MUCH into technical detail neither, because it would take weeks to cover gl-react features and its implementation tricks!
We have developed, at Project September, an universal OpenGL wrapper for React called gl-react working with 2 other libraries: gl-react-dom (wraps WebGL) and gl-react-native (wraps OpenGL).
The library allows to define advanced effects on top of images, videos, texts or any other VDOM Content (like UI Views).
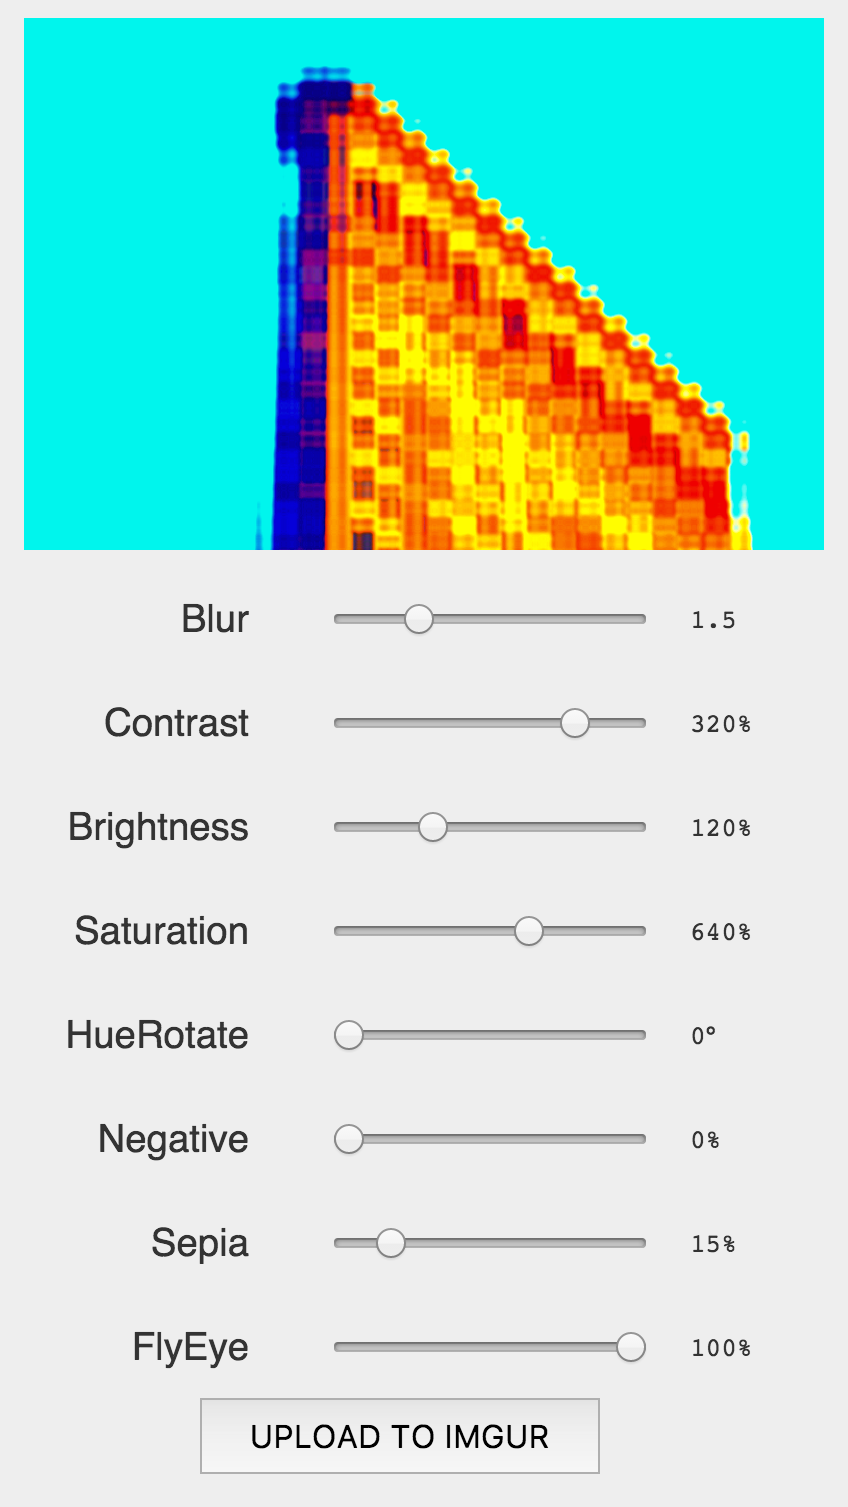
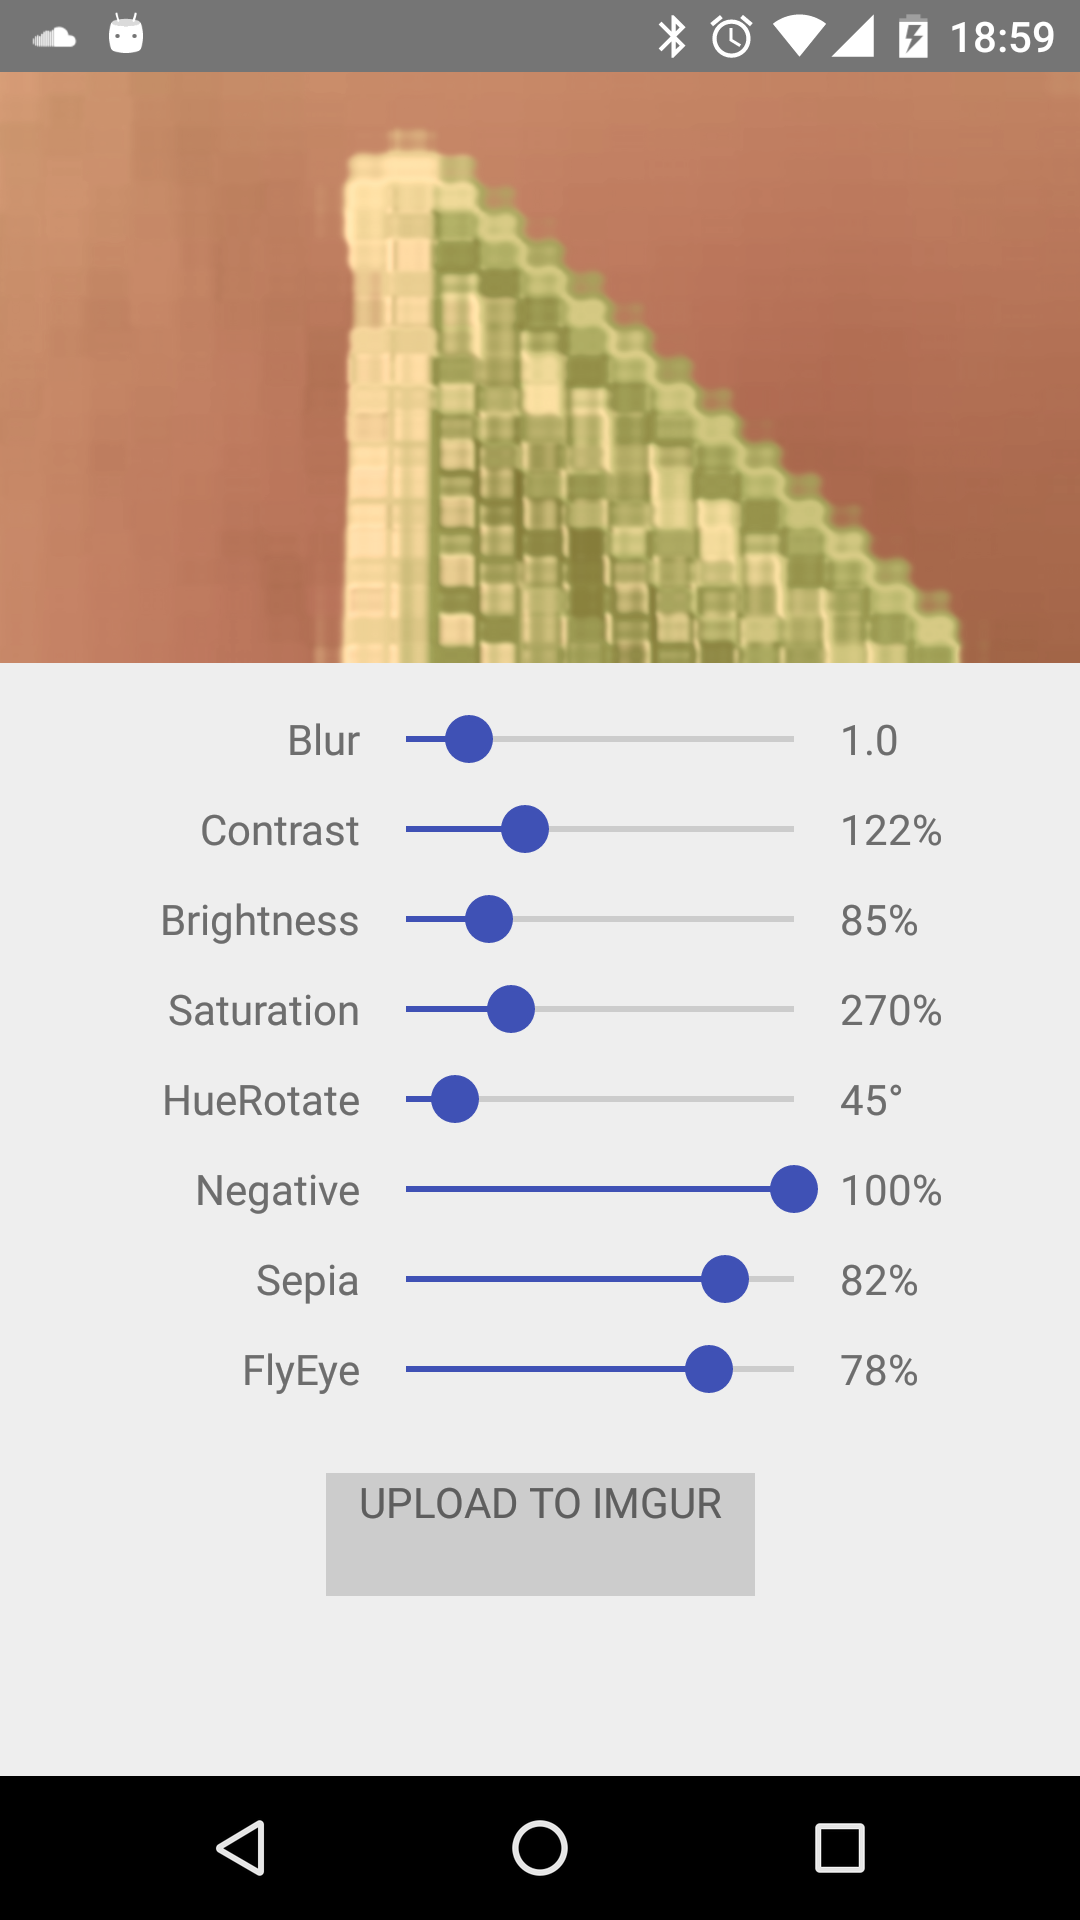
Checkout the following gl-react demos running with the same codebase across iOS, Android and the Web !!!
AdvancedEffects
github.com/gre/gl-react-image-effects
Adopting React paradigm
There are a few important points in React that gl-react follows to fit its paradigm.
1. React is about composition
Components are first class citizen in React.
A Component provides isolation by exposing a simple API (props) and encapsulates internal lifecycle.
One particular prop is the children prop that, by convention, allows to pass-in children components to a component.
For instance, we can define a component called Container taking a children prop and use it like this in JSX:
<Container>
  <div>Hello</div>
</Container>
Note that "JSX" is a syntax sugar that, in this example, transpiles to something like:
React.createElement(Container, {
  children: React.createElement("div", { children: "Hello" }),
});
There are really no magic here: JSX just tends to be more convenient to write and, most of the time, it would be more annoying to use createElement API.
2. React is about Functional Programming...
This might not be that obvious at a first glance but React is about FP. In React paradigm, you describe the full rendering of your application (in "Virtual DOM") for a given application state, and you do this every time something changes in the application. So fundamentally, you just have to implement that function from State to Virtual DOM to implement your web application – which is close to render loops in game dev (but it's another subject^^).
...and reconciliation on top of an underlying Imperative API
In React, you don't go mutating the DOM but you just RENDER EVERYTHING everytime! It's very simple to reason about, it removes lot of inconsistency bugs and React is here to optimize this with an algorithm called "reconciliation" (or diff/patch).
Efficiently translating an high level immutable API into a lower level mutable API is the hard work that solves React on top of DOM, as well does gl-react on top of OpenGL.
The reconciliation work done by React is a complex optimization problem that have trade-offs. This work is all about translating a imperative API (the DOM) to a functional API (React VDOM).
In gl-react, we have the exact same problem to resolve: gl-react exposes a functional API and implements for you the complex work over the mutable, stateful and low-level API that is OpenGL / WebGL.
3. React is a thin wrapper
One other key point of React is that it's a thin wrapper on top of DOM. React focus on translating imperative API => functional API with the most minimal & generic way, meaning that React won't hide you what the DOM elements are about (same as React Native tries just to be on top of real Native components).
We tried to follow this principle as well when wrapping (Open/Web)GL: we want to hide the complex and imperative part of GL but just expose the great functional parts that are the Fragment Shaders and the Framebuffers.
Hardcoding the vertex part of the pipeline
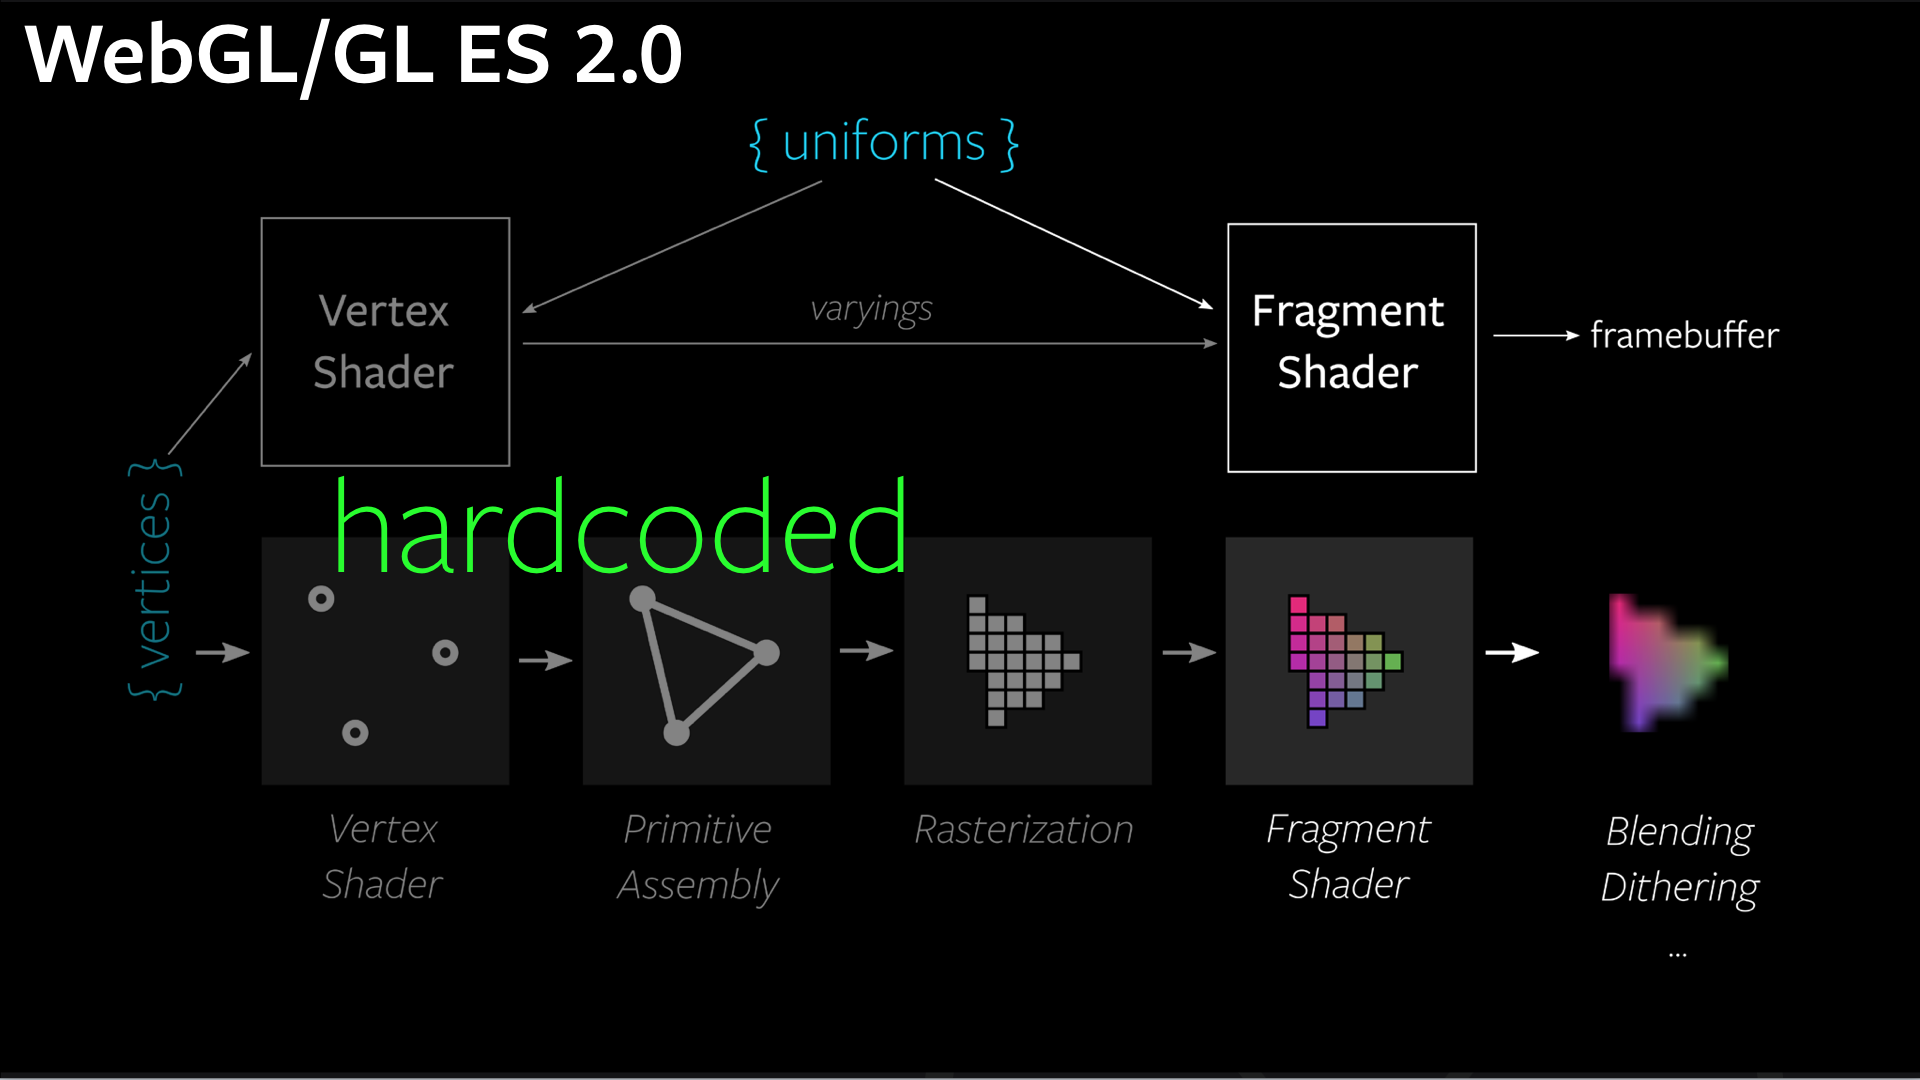
gl-react currently focuses on what can be achieved with composing Fragment Shaders with multiple Framebuffers that define a graph of effects. The Vertex Data & Vertex Shaders are currently hardcoded.
gl-reactmight unlock this hardcoded part in the future – some recent experiments by @snikhilesh shows a promising overview of what can possibility by done there!
But for now, we focus on the huge challenge to implement gl-react seamlessly between the Web, Android and iOS implementations and to work on performance (e.g of the content rasterization performance).
Notes from @greweb's #reactjsconf talk Universal GL Effects for Web and Native pic.twitter.com/JnIOjAQCOK
— Michael Chan (@chantastic) 23 février 2016
"Functional Rendering"
We mentioned earlier that gl-react focuses on one important piece of OpenGL that is the fragment shader.
A Fragment Shader is a function that independently colors each pixel:

Watch this talk for more detail on what I call Functional Rendering.
Fragment shaders use a language called GLSL for OpenGL Shading Language. GLSL is a DSL dedicated to the functional rendering paradigm with "graphics-ready" types (vectors, matrix, sampler2D for textures) and built-in functions (like mix, distance, pow, cos,...). Checkout the specification.
GLuing with React
gl-react is a core library: it doesn't provide any built-in effects, users have to provide the shaders to render. Hopefully it's fairly simple to implement basic effects (like saturation, contrast, brightness, inverse, hue,...) in GLSL language and Functional Rendering paradigm.
HelloGL example
Let's create HelloGL, our first fragment shader:
precision highp float;
varying vec2 uv; // This variable vary in all pixel position (normalized from vec2(0.0,0.0) to vec2(1.0,1.0))
void main () { // This function is called FOR EACH PIXEL
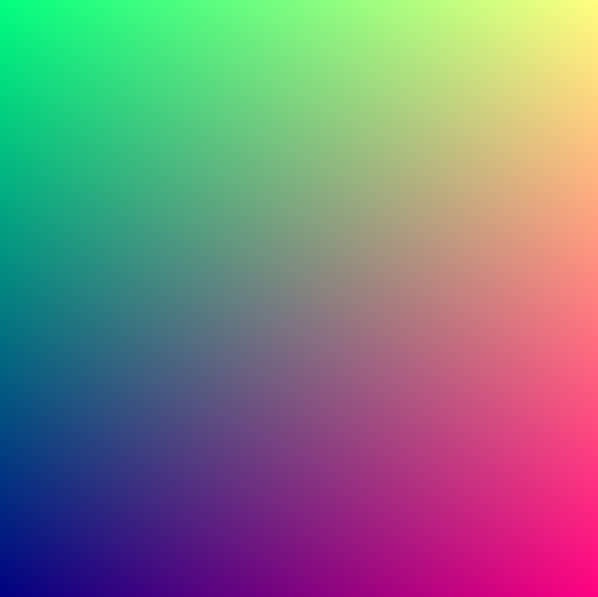
  gl_FragColor = vec4(uv.x, uv.y, 0.5, 1.0); // red vary over X, green vary over Y, blue is 50%, alpha is 100%.
}
It's a Point to Color function:
- the input comes from
varying vec2 uv - the output is set in
vec4gl_FragColor–main()is called for each pixel with a differentuv(it's varying like the keyword indicates).
so this HelloGL glsl code basically do:
[ x, y ] => [ x, y, 0.5, 1.0 ]
- The RED component increases with the X position of the pixel.
- The GREEN component increases with the Y position of the pixel.
which renders this nice 2D gradient:
Now, in gl-react, we can define "HelloGL" as a GL Component with:
import GL from "gl-react";
import React from "react";
const shaders = GL.Shaders.create({
  helloGL: {
    frag: `
precision highp float;
varying vec2 uv;
void main () {
  gl_FragColor = vec4(uv.x, uv.y, 0.5, 1.0);
}`,
  },
});
const HelloGL = GL.createComponent(() => <GL.Node shader={shaders.helloGL} />);
and then use it:
<HelloGL />
ColoredDisc example
GL Component can have props in parameter that can be passed-in as GLSL Uniforms.
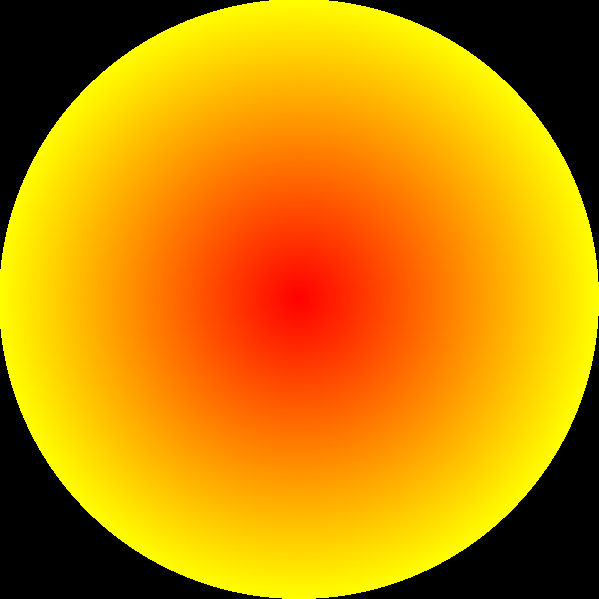
<ColoredDisc fromColor="{[" 1, 0, 1 ]} toColor="{[" 1, 1, 0 ]} />
import GL from "gl-react";
import React from "react";
const shaders = GL.Shaders.create({
  ColoredDisc: {
    frag: `
precision highp float;
varying vec2 uv;
uniform vec3 fromColor;
uniform vec3 toColor;
void main () {
  float d = 2.0 * distance(uv, vec2(0.5));
  gl_FragColor = mix(
    vec4(mix(fromColor, toColor, d), 1.0),
    vec4(0.0),
    step(1.0, d)
  );
}`,
  },
});
const ColoredDisc = GL.createComponent(({ fromColor, toColor }) => (
  <GL.Node shader={shaders.ColoredDisc} uniforms={{ fromColor, toColor }} />
));
DiamondCrop example
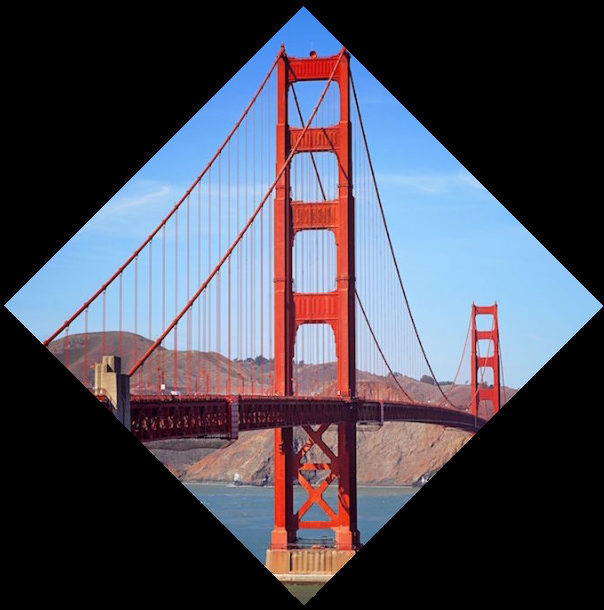
<DiamondCrop> http://i.imgur.com/rkiglmm.jpg </DiamondCrop>
import GL from "gl-react";
import React from "react";
const shaders = GL.Shaders.create({
  DiamondCrop: {
    frag: `
precision highp float;
varying vec2 uv;
uniform sampler2D t;
void main () {
  gl_FragColor = mix(
    texture2D(t, uv),
    vec4(0.0),
    step(0.5, abs(uv.x - 0.5) + abs(uv.y - 0.5))
  );
}`,
  },
});
const DiamondCrop = GL.createComponent(({ children: t }) => (
  <GL.Node shader={shaders.DiamondCrop} uniforms={{ t }} />
));
Any content can be used
Let's say we define a Blur effect with gl-react.
const Blur = GL.createComponent(({ children, factor }) => ...);
Here, we have just defined a GL Component Blur that accept a children as a props.
It also accept a factor prop to define the intensity of that blur.
Therefore we can use Blur using JSX in many ways.
N.B. If you want such a Blur, checkout gl-react-blur.
First of all you can blur an image:

<Blur factor="{2}"> http://i.imgur.com/rkiglmm.jpg </Blur>
But really anything can be passed-in here. For instance, a video
<Blur factor="{0.6}">
  <video src="/video.mpg" />
</Blur>
or a canvas:
<Blur factor="{0.7}">
  <canvas ... />
</Blur>
and where that canvas can be provided by a library, like react-canvas:
<Blur factor="{0.9}">
  <ReactCanvas.Surface ...>
    <ReactCanvas.Text ...>Hello World</ReactCanvas.Text>
  </ReactCanvas.Surface>
</Blur>
In React Native context, we even have support for ANY view. It can be a simple Text:

<Blur factor="{0.9}">
  <Text ...>Hello World</Text>
</Blur>
or even a native component like a Switch component

<Blur factor="{0.9}">
  <Switch ... />
</Blur>
The way this is implemented is platform specific. For instance the Web implementation will just render the content into WebGL (so it works with images, videos, canvas, but not any arbitrary DOM element due to Web Security limitations). However, the Native implementation will be able to rasterize (almost) any view and inject it as a texture (consider this feature experimental at the moment).
Compose, Compose, Compose
But composition is probably the MOST important part of this: You can also pass a GL Component in uniforms!
So all possible composition of previous examples will just work
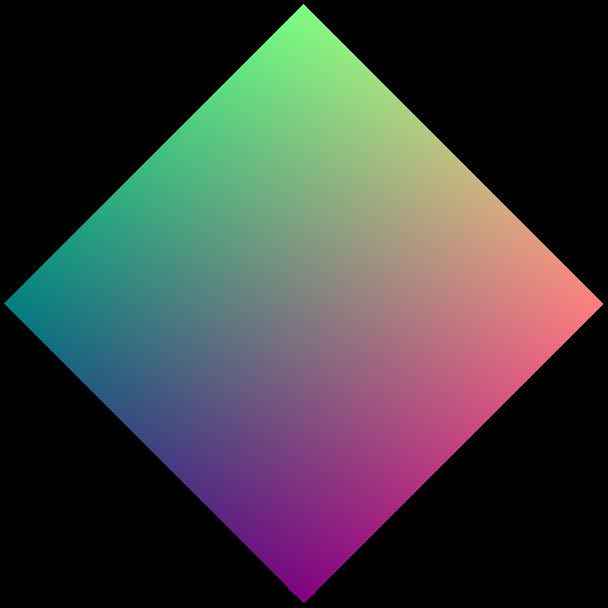
<DiamondCrop>
  <HelloGL />
</DiamondCrop>

<Blur factor="{4}">
  <DiamondCrop>
    <HelloGL />
  </DiamondCrop>
</Blur>
gl-react makes composition efficient using OpenGL Framebuffers.
This approach encourages you to write small and generic shaders (instead of one monolithic and specific shader).
For this composition to work correctly, the components must be created with
GL.createComponentor directly beGL.Nodecomponents.
To actually get a rendering with gl-react, you need to put your GL Component stack into a
For instance, to render HelloGL on a 200x200 canvas:

<Surface width="{200}" height="{200}">
  <HelloGL />
</Surface>
import { Surface } from "gl-react-dom";
import { Surface } from "gl-react-native";
Surface implements the rendering in the contextual platform:
- If you import
{Surface}fromgl-react-domit will renders into a WebGL Canvas (web), (it's backed by great stack.gl libs) - If, instead, it comes from
gl-react-native, GLKView (iOS) / GLSurfaceView (Android) will be used.
Surface have roughly the same API across these 2 libraries but some props might exist only on one of the implementations.
Dynamic Blur Image Title Example
My talk featured an advanced use-case that we had in my startup, Project September. We are developing a social mobile app with React Native and our designer wanted to have title over image with Blur effects around the title text.
This effect is just exposed as a simple ImageTitle React component that we can use like this:
<ImageTitle text="Hello San Francisco ☻">
  http://i.imgur.com/XXXXXX.jpg
</ImageTitle>
The point of gl-react is we all know how to compose React components, just put it in a Surface and you obtain a title over image effect like on the image above.
we can even run the effect over a video
<ImageTitle text="Hello San Francisco ☻">
  <video src="video.mp4" />
</ImageTitle>
which is what our demo does if you enable the video mode.
Under the hood
This section will show ImageTitle implementation that will illustrate
gl-reactoptimization techniques.
Let's take a quick look at our ImageTitle shader. That shader renders the title text on top of the blurred image. The title text color is chosen based on the average pixel color (if the content is dark, we use a white title, otherwise a black one).
I won't enter more into implementation detail, but here is the fragment shader:
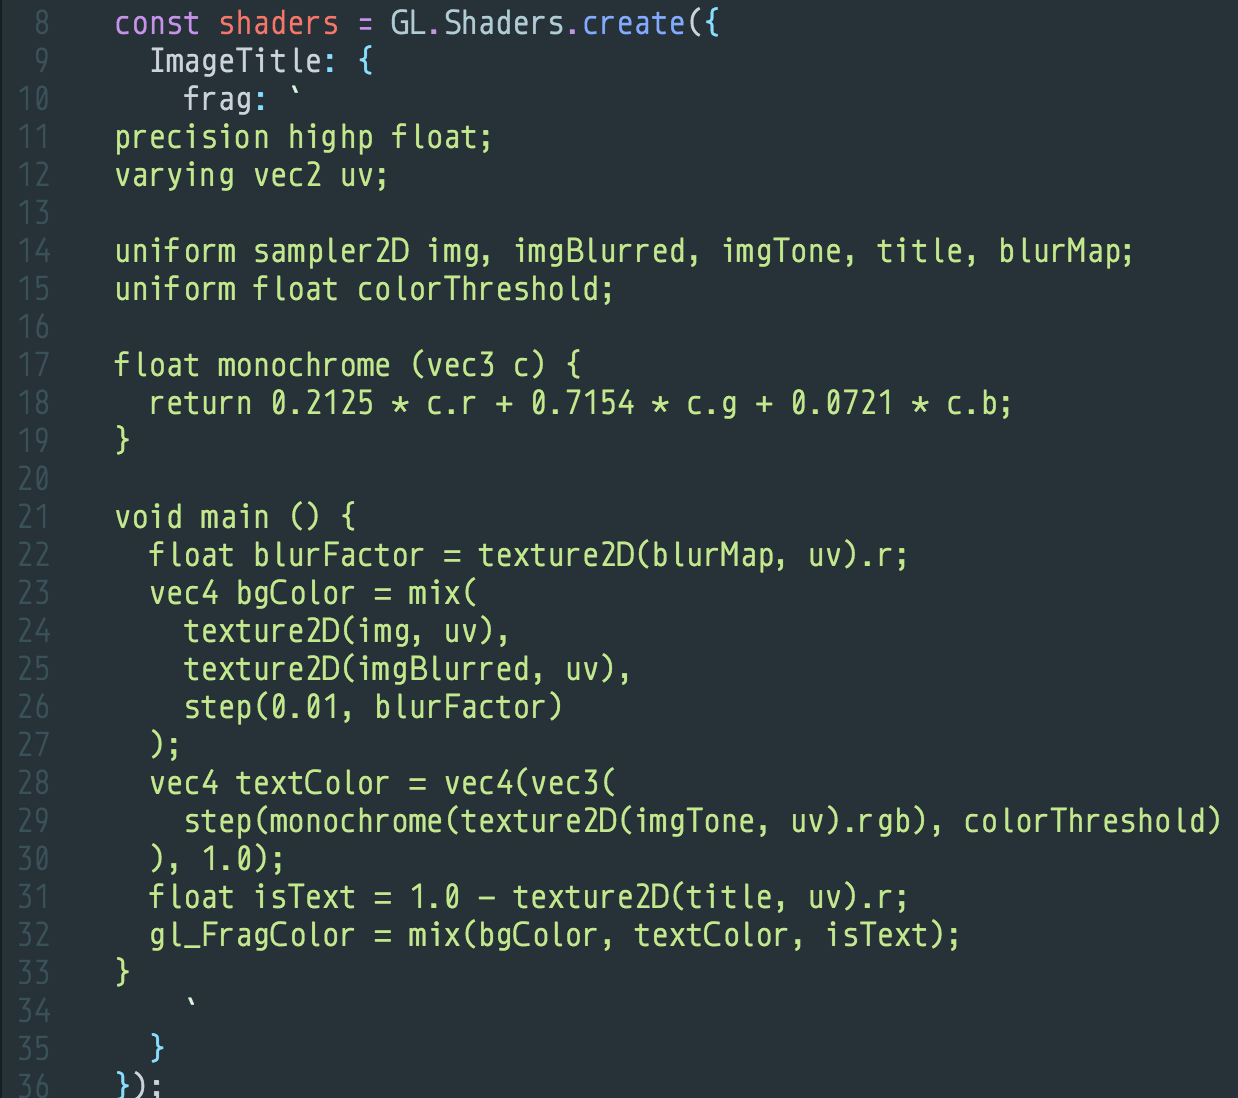
Now, let's focus on our JavaScript gl-react code.
ImageTitle is a GL Component that takes a few props (basically title and children) and delegates the job using a few other Components: Title that renders the text, TitleBlurMap that generates a blur map of that text, BlurV that apply the blurmap to generate a variable blur over the content (image/video), AveragePixels that generate one pixel out of the content.
These 4 elements are then composed into our final ImageTitle shader.

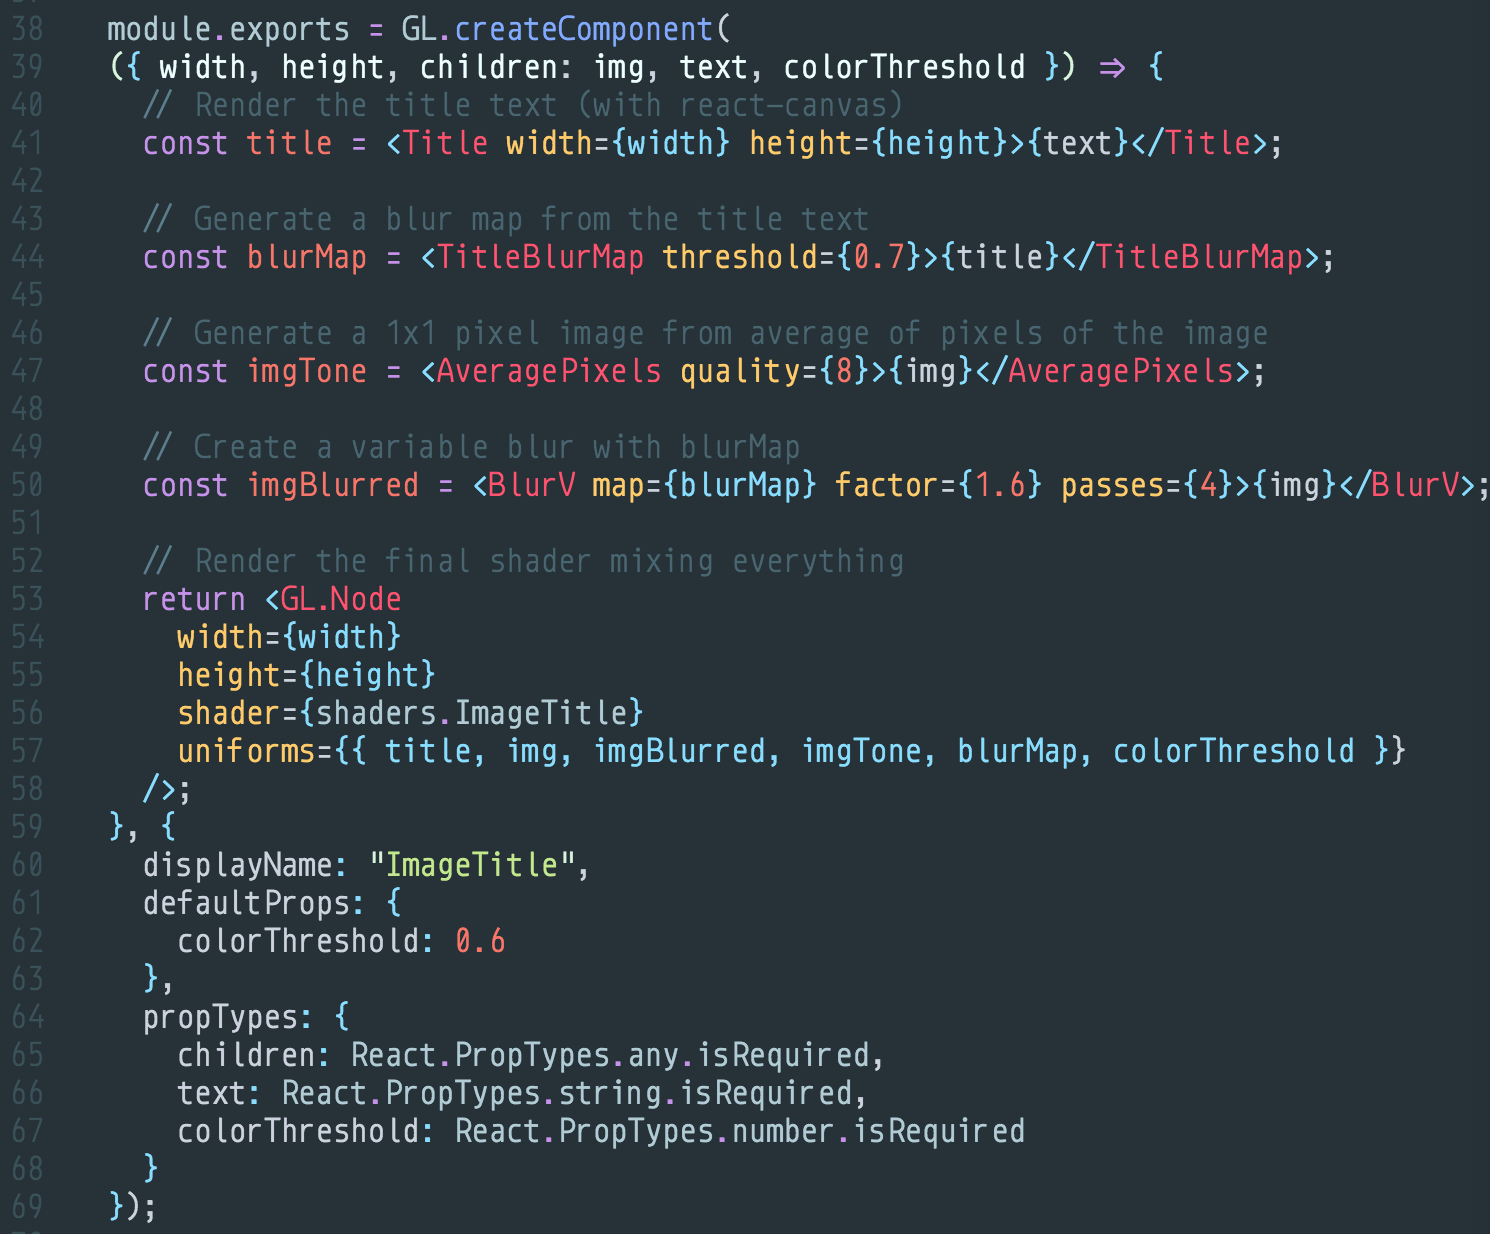
Composition is the key point here, we have defined our component with simple code, delegated and composed part of the effect with other component.
And each sub-component is doing more work. For instance TitleBlurMap is itself another GL component, which uses composes a component Blur and apply a threshold to generate a black and white blur map:

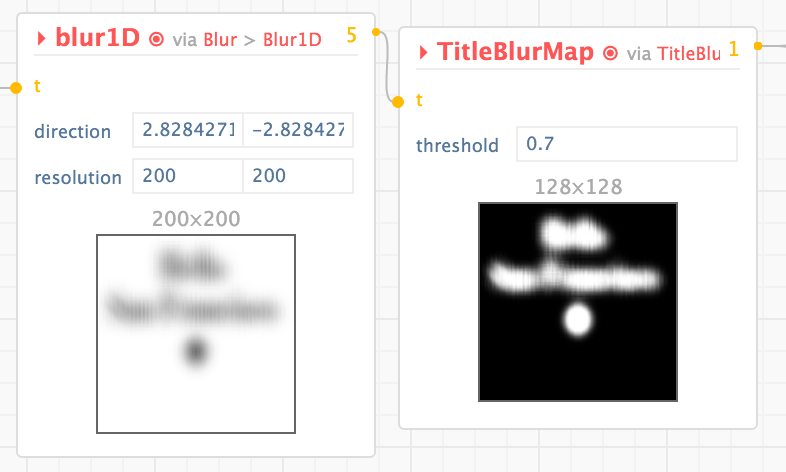
And so on! Blur is itself another GL component! And like BlurV, it is implementing a 4-pass blur, so it will pipe 4 times a Blur1D component:

Blur simply recursively composes Blur1D:

Have I lost you? Don't worry, we will show in a few section what the big picture scene looks like.
How gl-react transform your Surface and effects stack
We have just overviewed how deep a GL effects stack can be: going down into each individual component that itself use many other components can ends a with a pretty big tree. That's true for any React application actually, but React is still performant.
However, we have a fundamental difference between classical React DOM and gl-react: a GL effects stack is just a single Canvas element at the end.
When you write a tree of GL Components, each component don't get append into the DOM like would do a stack of Virtual DOM elements. Instead we need at the end to render the full Virtual GL tree into one single
<canvas/>.
Therefore, we don't treat GL Component the same way React does. gl-react will do internal work to unfold user's Virtual GL tree and convert it into a "scene" object that contains everything a renderer need to know. This object is passed as a "data" props to the underlying implementation (that we call internally GLCanvas).
If we inspect with React Dev Tools what our <Surface/> actually gets render into you will see something like this:

Actually, the Surface get rendered into a... <div/> (1). We need to do this because we need to not only render the Canvas (3) but we also need to render any possible content that was passed-in the stack that would need to get rasterized (in web context, it can be a video or another canvas). In our case, it's the <Title/> component, that is backed with react-canvas to draw Text using a Canvas (the only simple way to get texts in WebGL). So this is why we need (2), that is a container for the content, that container is moved behind the canvas and is made invisible (unless you enable some hidden secret props! read more about advanced props of Surface in the documentation).
How gl-react optimizes the effects stack & factorize computation
The previous complex example, if implemented naïvely, ends up with this big tree:
1. Before factorization optimization: (naïve implementation)
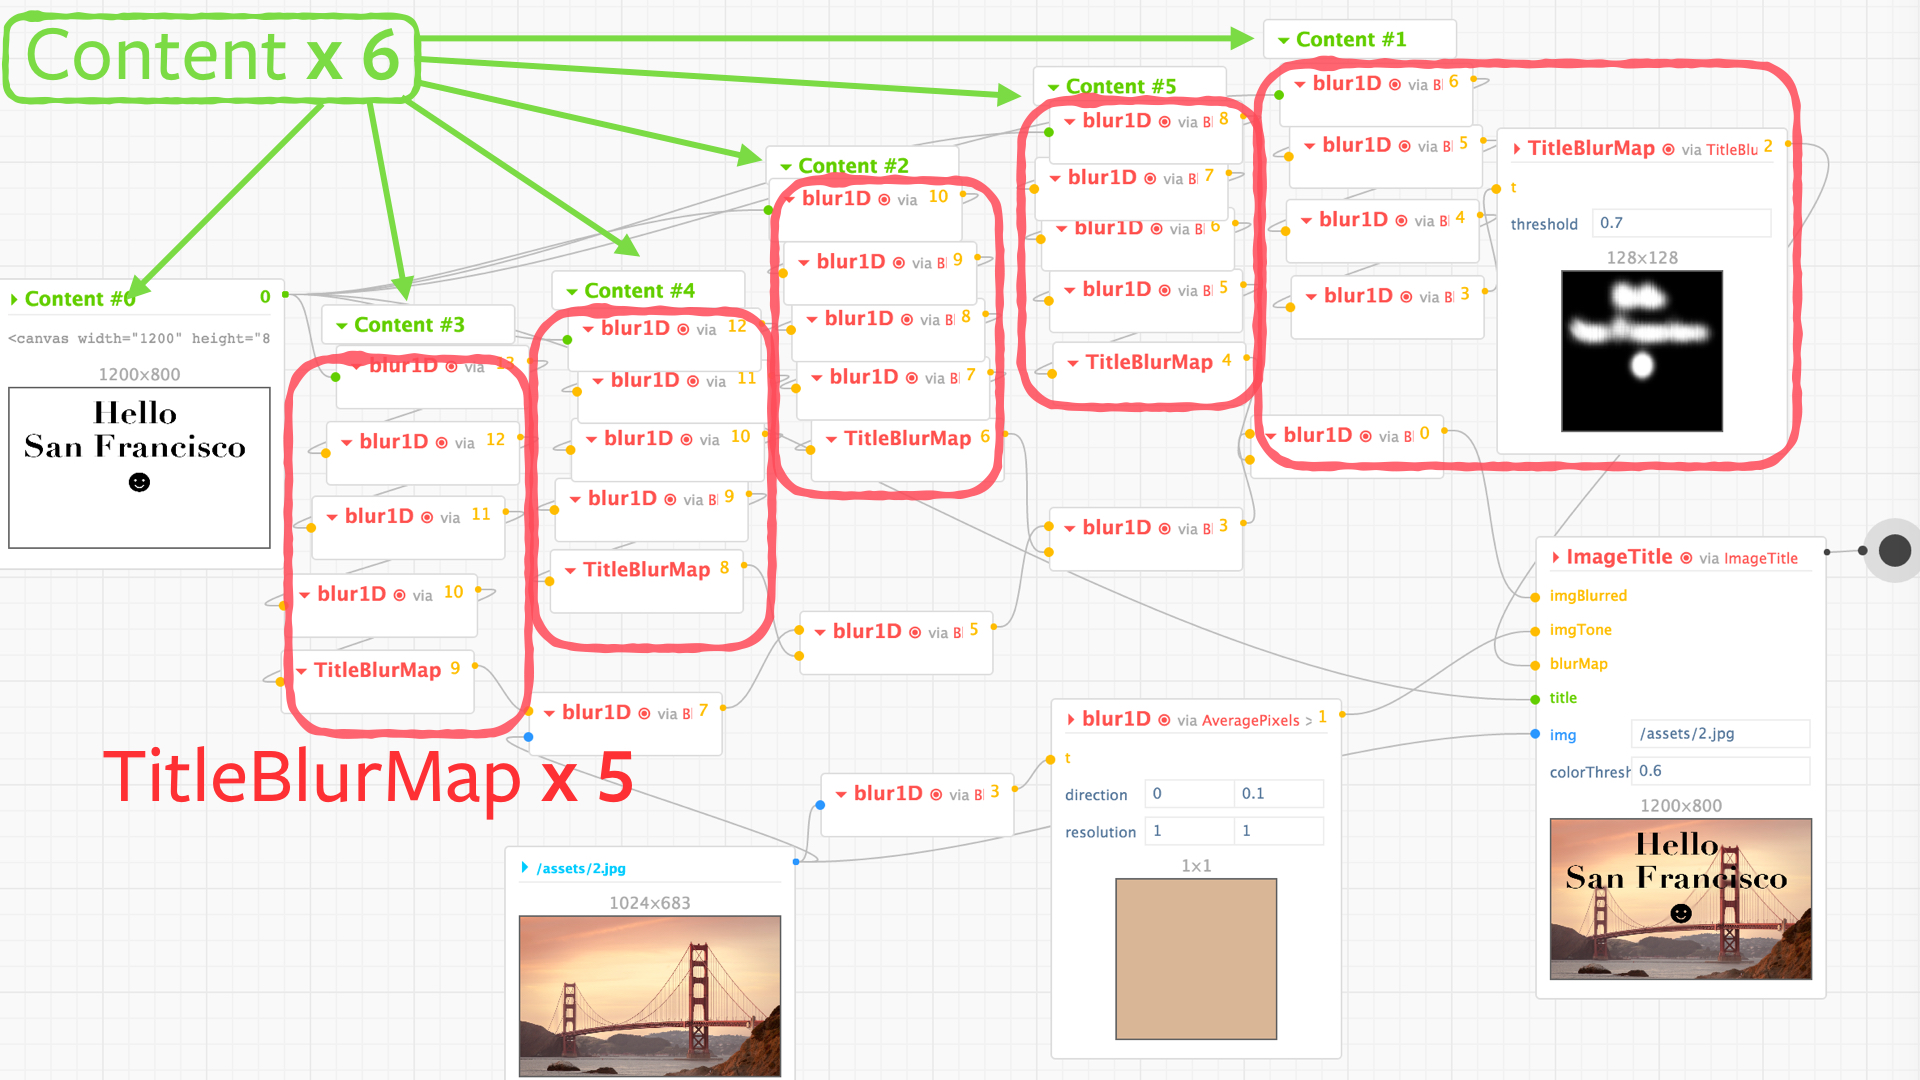
It contains a lot of duplicates: the Title rendering appears 6 times and the "Text Blurring 4-Blur stack" also appears 5 times.
This is just computing the same thing multiple times where we should be able to compute it once...
To solve this, we will just use the VDOM referential transparency: if 2 VDOM element have the same reference, we can assume it renders the same thing so we can just dedupe to share and render it once.
This is one of our biggest innovation in
gl-react: when you give a stack of effects in Surface, we will dedupe the tree.
At the end of this process our example results of:
2. After factorization optimization:
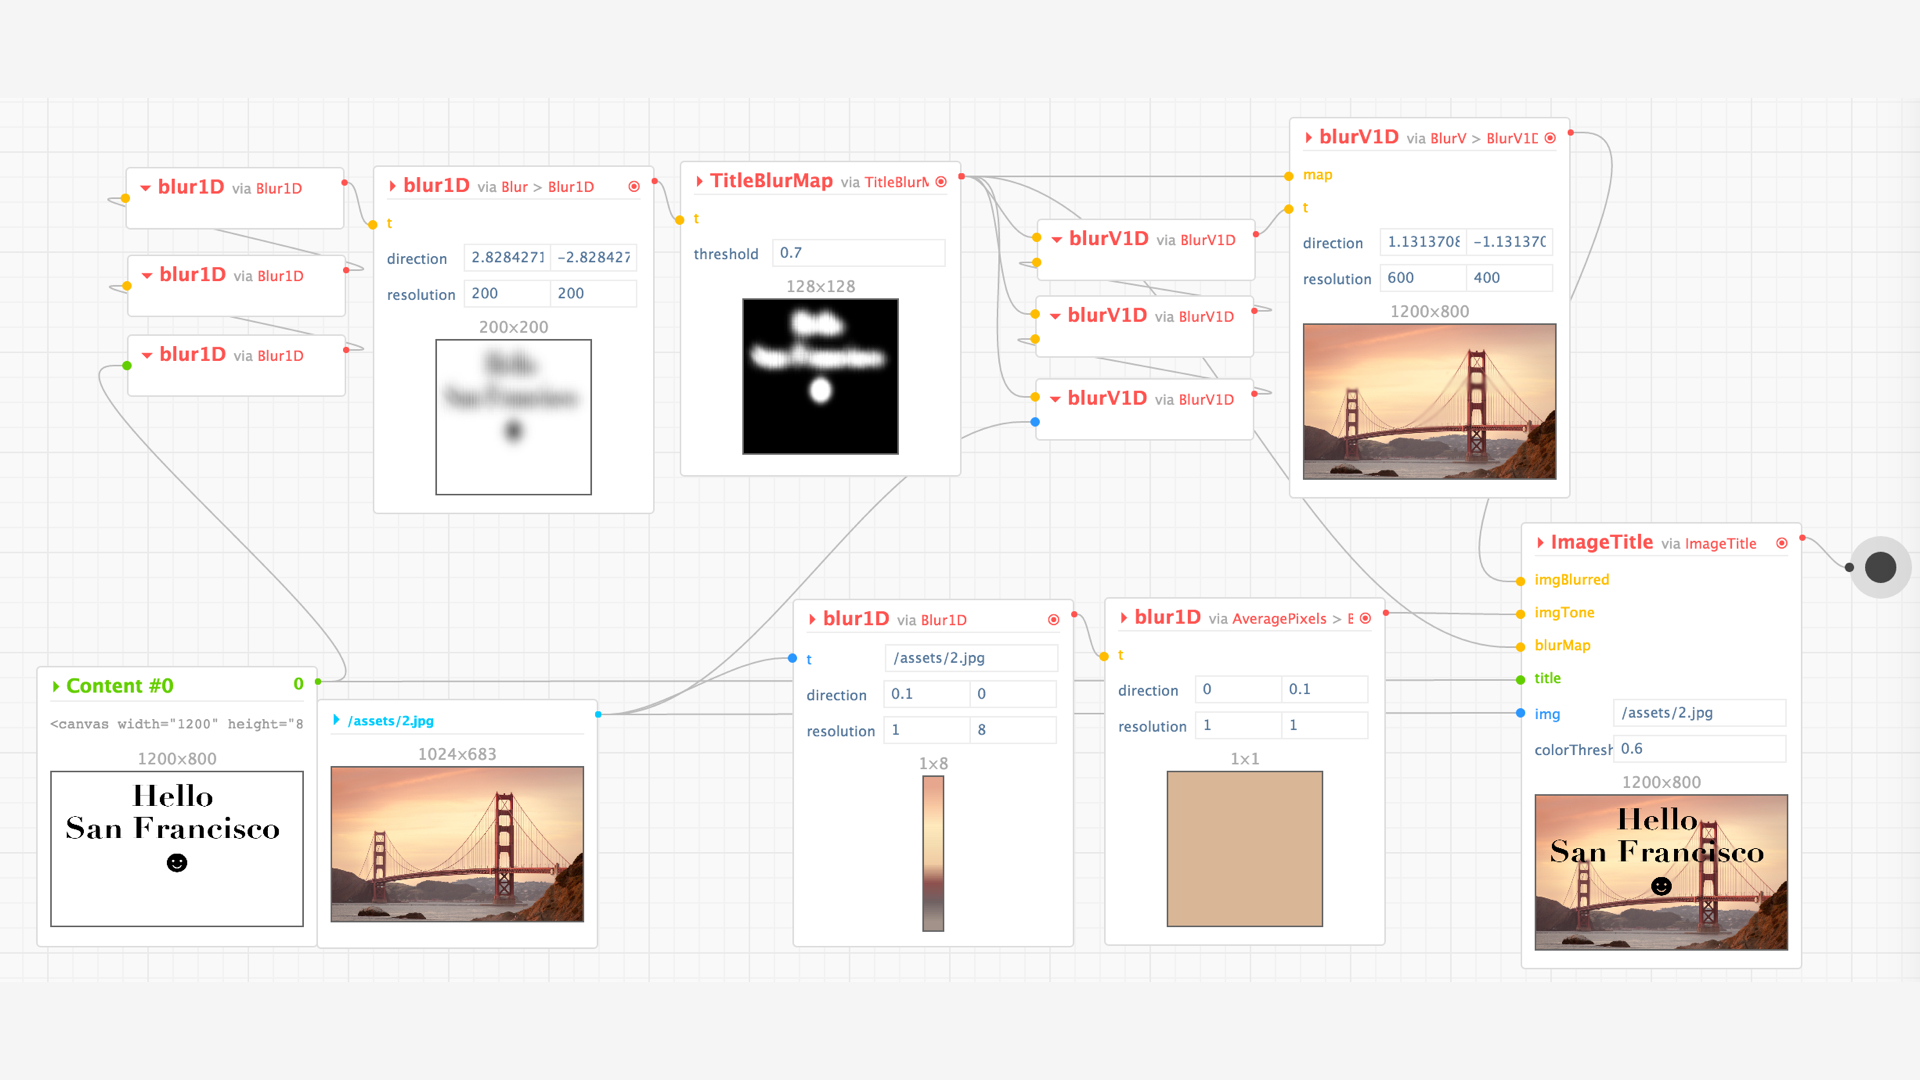
We have moved from 38 to 13 nodes and reduce the render speed from 20ms to 4ms.
Conclusion
If you would implement a stack of effects using the imperative OpenGL API, you would obviously write an ordered sequence of effects to do and that would naturally share the computations in temporary buffers for best performance.
The important job of gl-react is to allow you to write descriptive code without losing this advantage of using temporary pixel buffers and keeping a thin layer on top of the underlying OpenGL.
Other side projects
gl-react-inspector
One of the most appreciated part in my talk is the Inspector we specially develop for gl-react.
I initially developed it because I wanted to have charts to show people what gl-react graph looks like and without having to go Inkscape and handcrafting them... But it ended up behind a useful tool to actually develop with, because you can see what's going on underneath (at each node step, and what the texture looks at intermediary steps). It also helps seeing investigating on performance.
Our big future challenge with this is to make it work as a standalone devtools (I imagine it could be part of the React devtools, if we could have plugins there). and to make it work with React Native too.
gl-react-dom-static-container
https://github.com/gre/gl-react-dom-static-container
Some universal GL effects
- gl-react-blur
- gl-react-negative
- gl-react-constrast-saturation-brightness
- gl-react-hue-rotate
- gl-react-color-matrix
gl-react-image
gl-react-image is a component that solves preserving ratios of your images (because stretching is the default behavior).
We need your help!
What should come soon
- caching framebuffers from one frame to another: allow different interesting things: cache part of the graph (e.g to allow to cache a static intensive part of the graph), cache part of a rendering with
discard;(e.g if you make a Paint like) or even more crazy things like being able to inject the previous buffer as a texture to implement things like motion-blur or even cellular automata.
What might come after this
- react-native-video / react-native-camera
- static vertex data as well as static vertex shader is a current and decided (? chosen) limitation of
gl-react. We want to focus on the incredible capabilities of fragment shaders and work on all optimization that can be made to improve the performance of working with this subset of OpenGL.
Other features
This library begin the journey of bringing OpenGL to most people using the React simplicity, hiding some complex parts of OpenGL but allowing to implement the fundamental functional bricks of it.
There are a bunch of other features that would take me weeks to explain, but feel free to read the documentation to learn more about the other props and features.
